Post by JulioNIB on Dec 19, 2013 8:37:13 GMT -3
IMPORTANT: This tutorial is very basic, just to show a basic way to create a custom shape and insert in GTA IV 
Ok, first of all the requirements:
ZModeler (recommended 2.2.6 build 992)
OpenIV
GTA IV/EfLC
Open Zmodeler, you probably will have this screen:
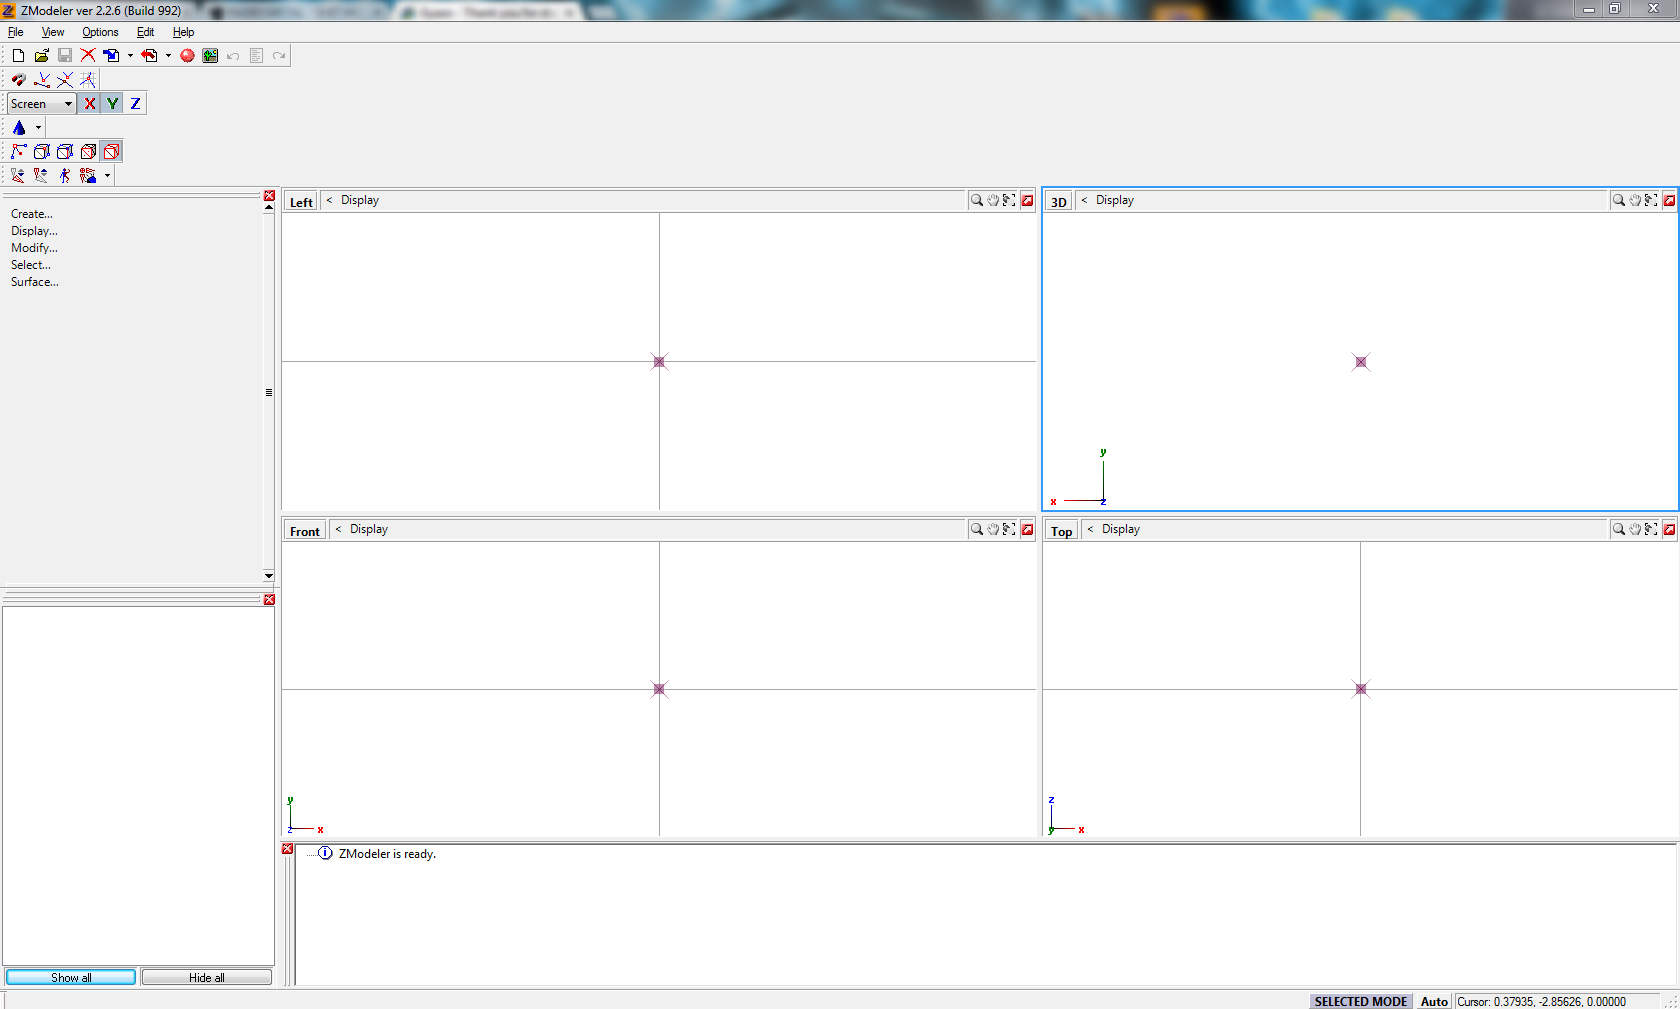
Make sure that your screen looks close to the one in last picture, the SELECT MODE and the "Auto" buttons may affect if they are down.
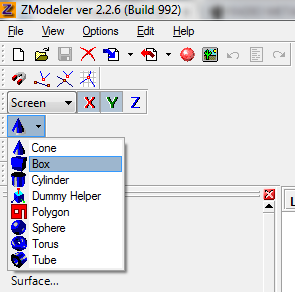
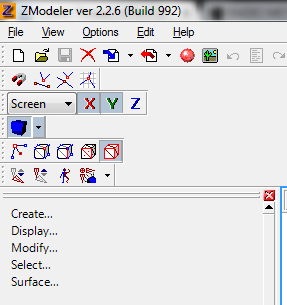
Now let's draw a simple cube, click in the following button and select Box, then click again over the Box icon to select the feature:
 >>>
>>> 
Now in one of the screens draw a simple square:
Do a simple click where you want to start the square, move mouse where you want to be the oposite corner then click again, now move mouse to determine how "long" this object will be, click again and a window should appear, just click OK:
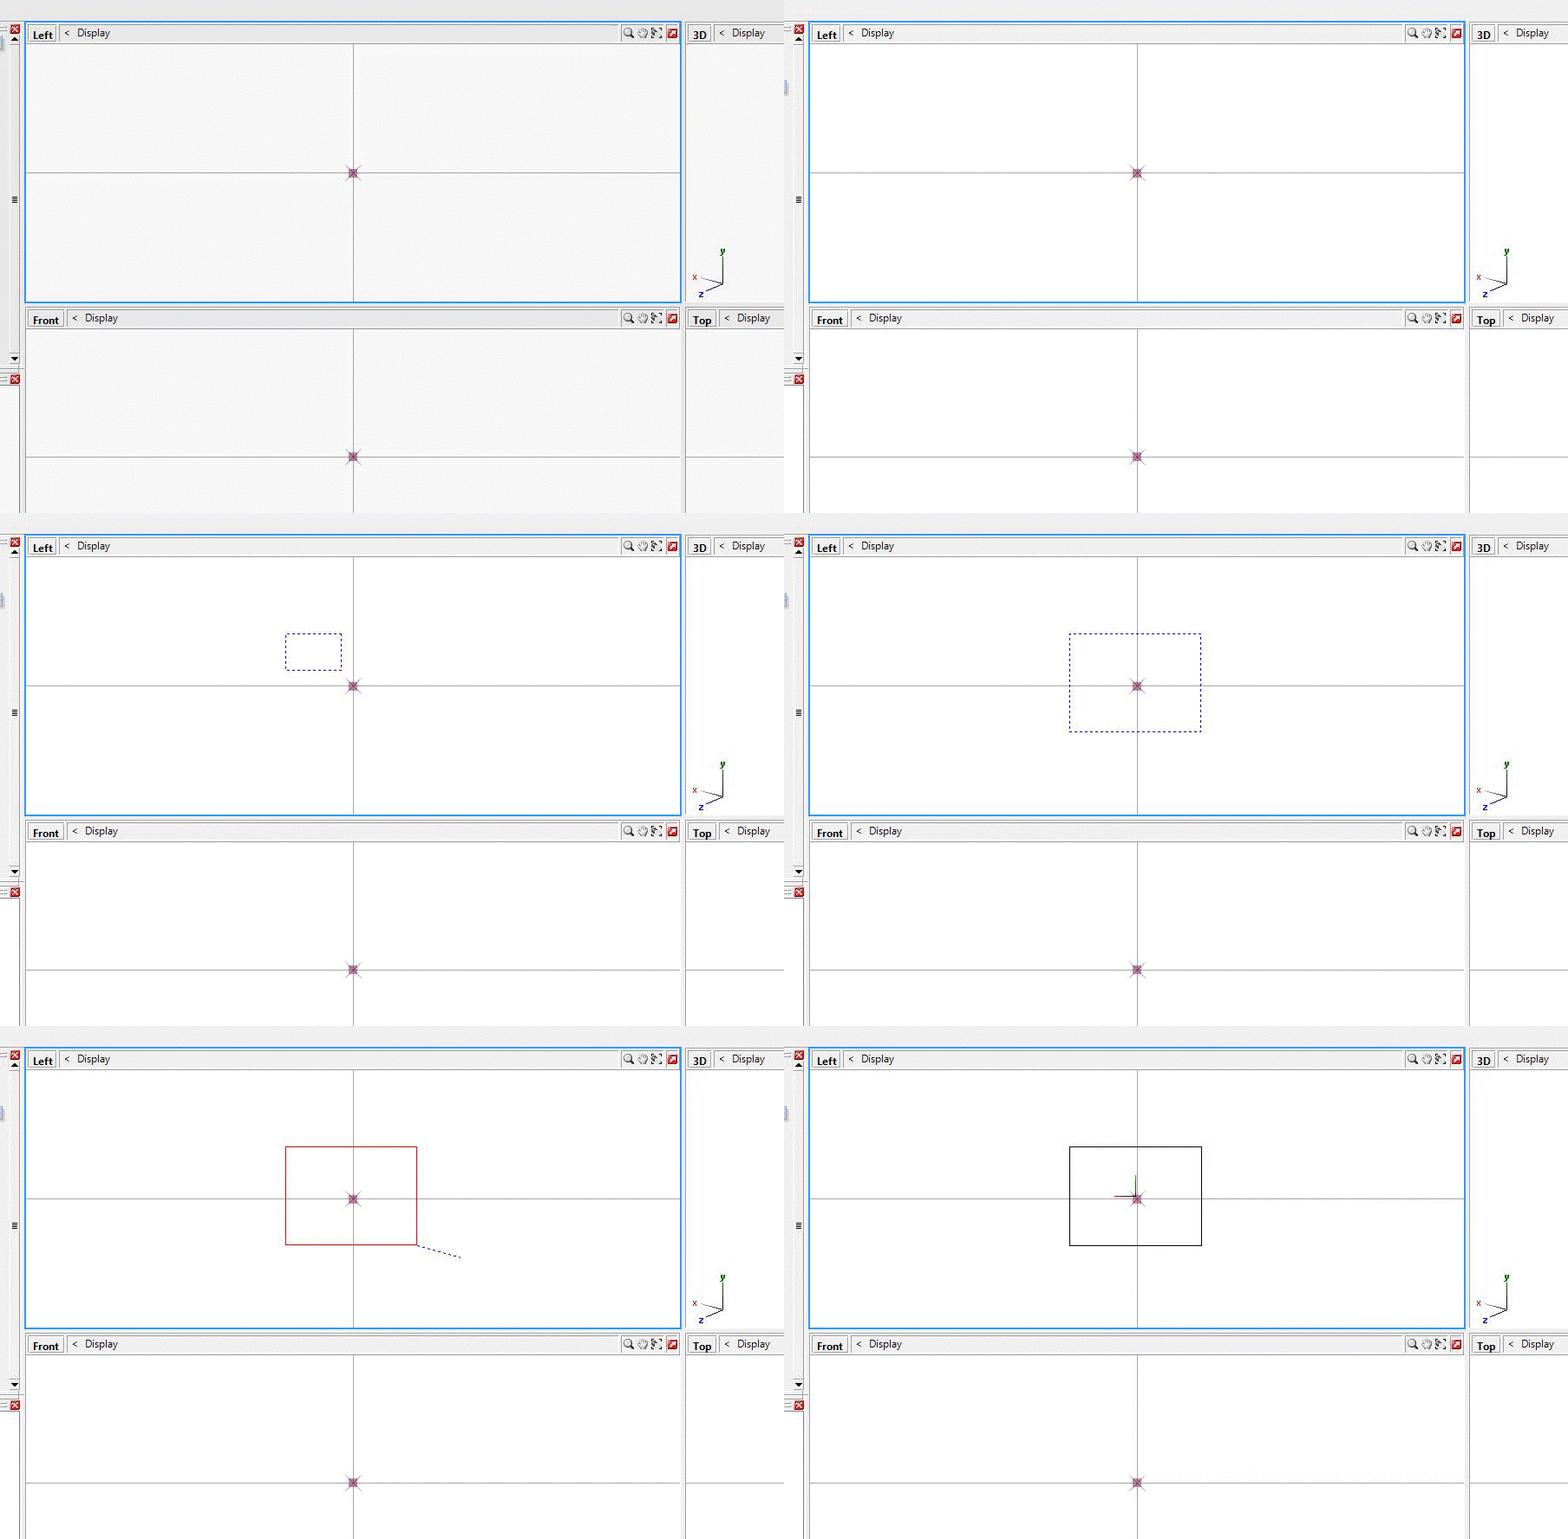
If everything is fine you should see a shape on screen, if you go to the 3D window you can use mouse click and move + scroll to change zoom and rotation around the 3D object:
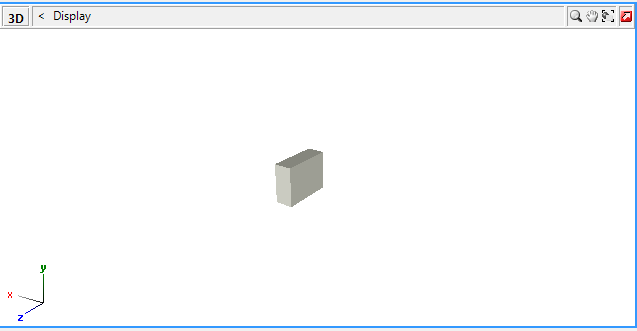
Let's make another shape just for example, this time a cone, in that button where you selected Box select Cone:
 In one of the draw windows click where you want to be the center of the cone like if you are seeing him from above, then move mouse to determine the diameter and click again, now move the mouse determining the height of the Cone:
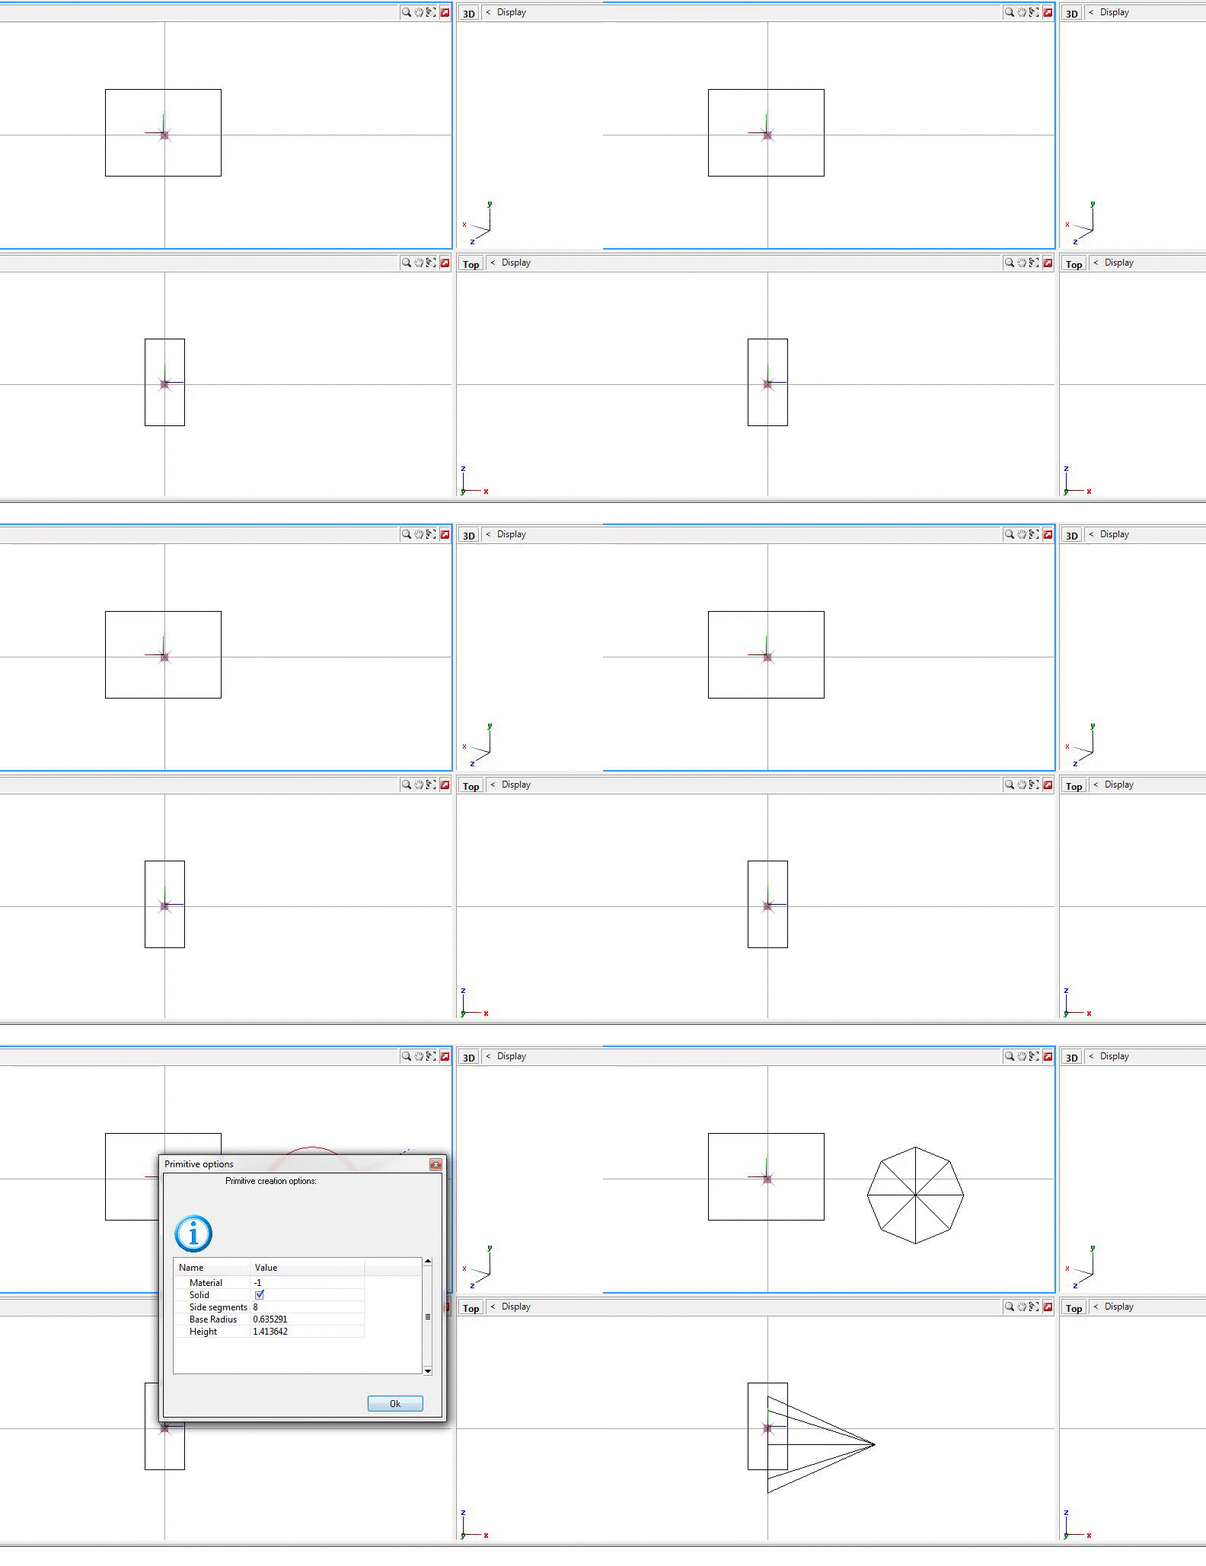
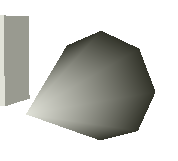
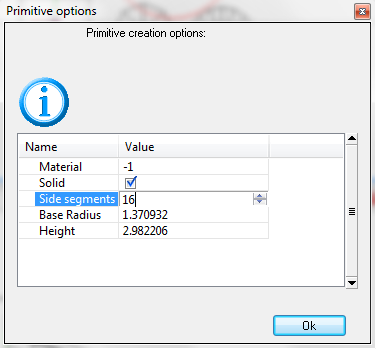
After doing the last click you will see that window with Ok button again (Primitive options), in this window you can increase or decrease the "level of detail" of this cone changing the value of Side segments, the default value is 8 sides that will result in something like this:
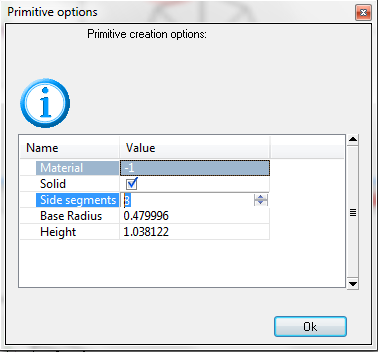 >>>
>>>
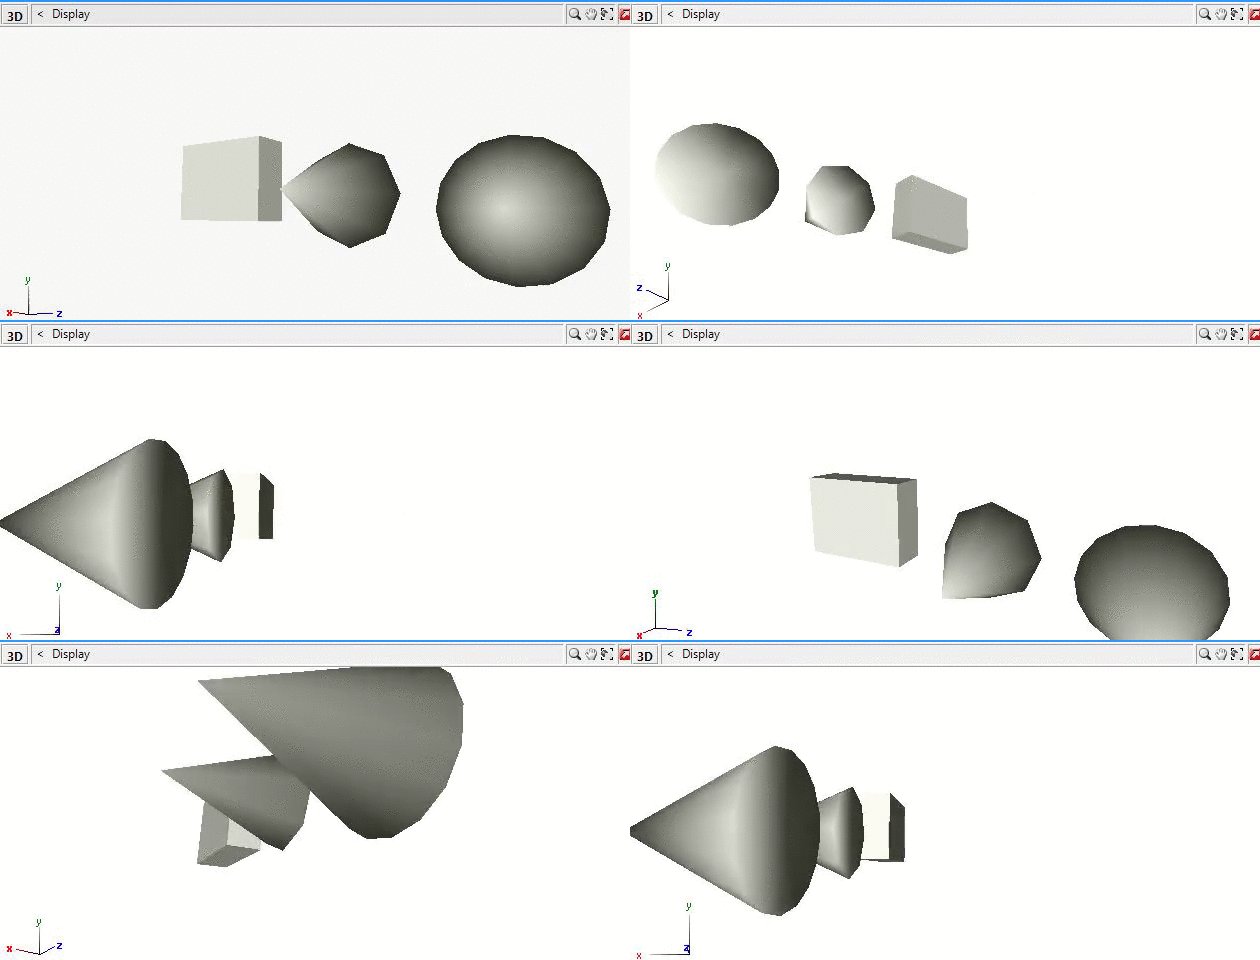
If you increase to 16 for example you will have something like this:
 >>>
>>>
Ok, now another basic feature that we need to know how to use is Move, let's move those objects to create something less ridiculous ^^
In the left side you will see some options (Create, Display, Modify, etc.), click in Modify and then click in Move, now in one of the 2D windows, move mouse over one of the objects and you will see that it changes his color, if you click and hold you can move the object in that 2D window, if you need to move in different directions you need to perform this action in one of the other 2D windows.

IMPORTANT: The type of selection determined by those buttons here: will determine what you will move, the default selection (Object) will move entire object, the other options will move faces or single parts of the object, i don't will talk about them now but you can kid with them and see what happens.
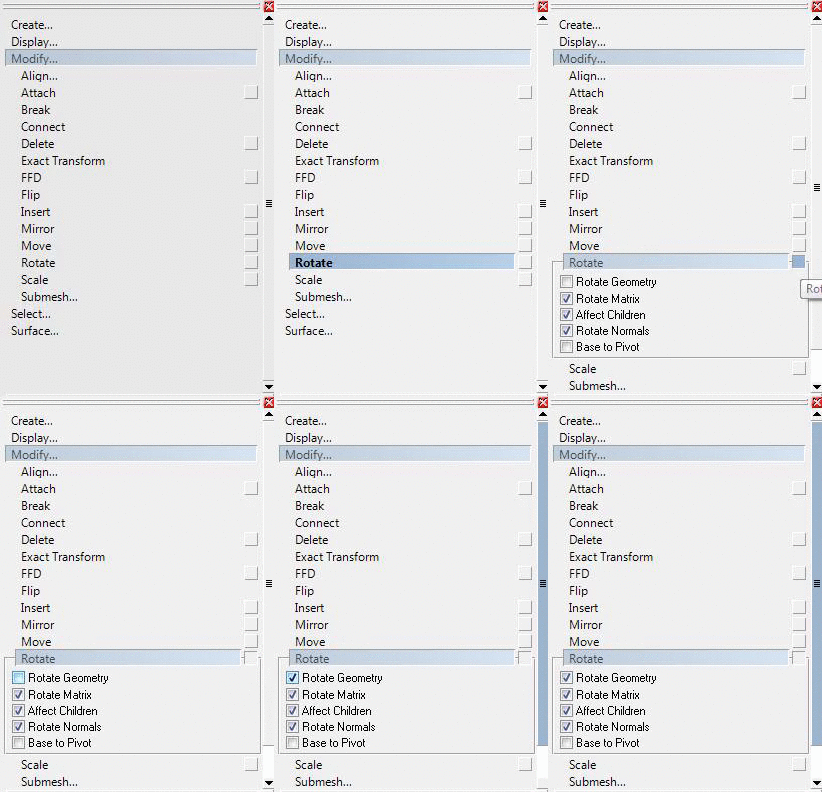
Other usefull feature is the Rotate, you can access it in same menu where you find Move, before use it make sure that the option Rotate Geometry is marked clicking in the little square that is in front of Rotate text:
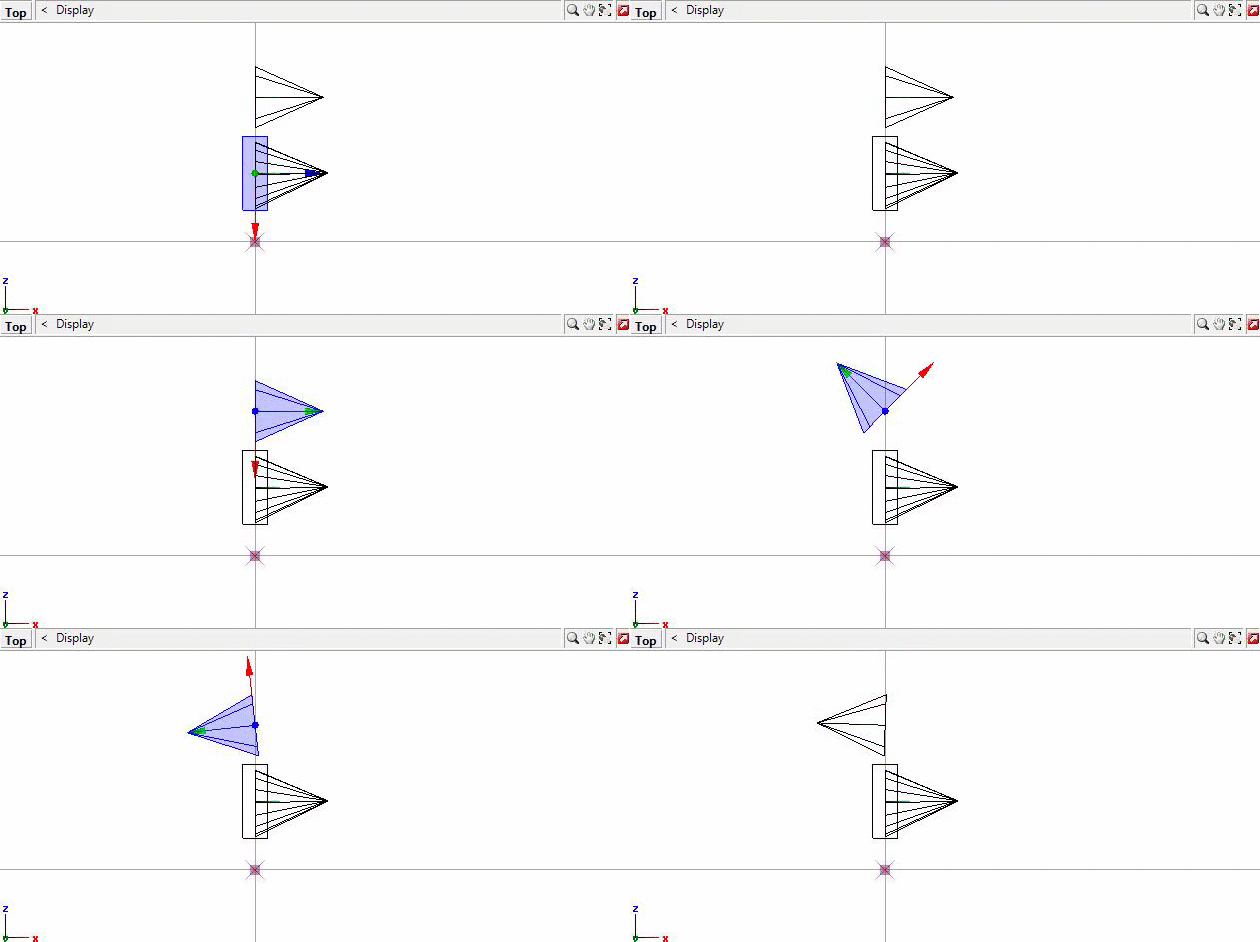
Now in one of the 2D windows put mouse over one of the objects and click and move the mous around, the object should spin:
If you need to perform a exact rotation you can use the feature Exact transform.
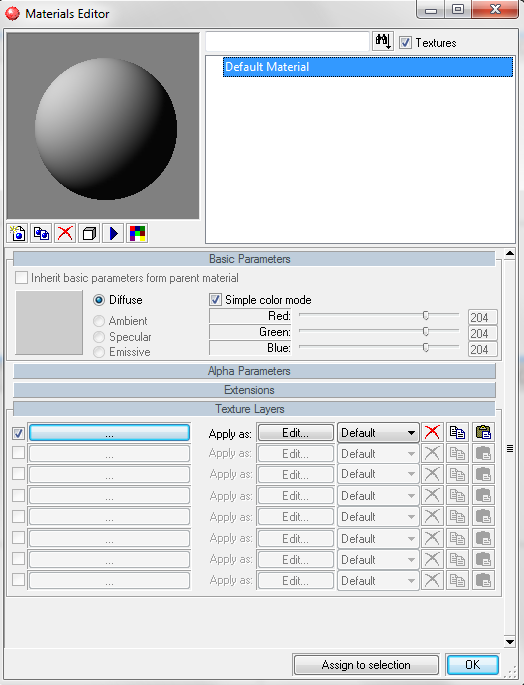
Now let's add a very basic texture just to let you know where to set the texture, first of all let's add two different "textures", click in View > Materials editor, a window like this should appear:
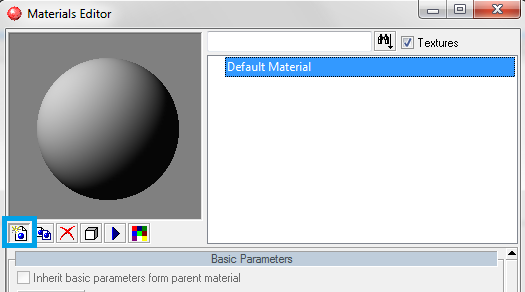
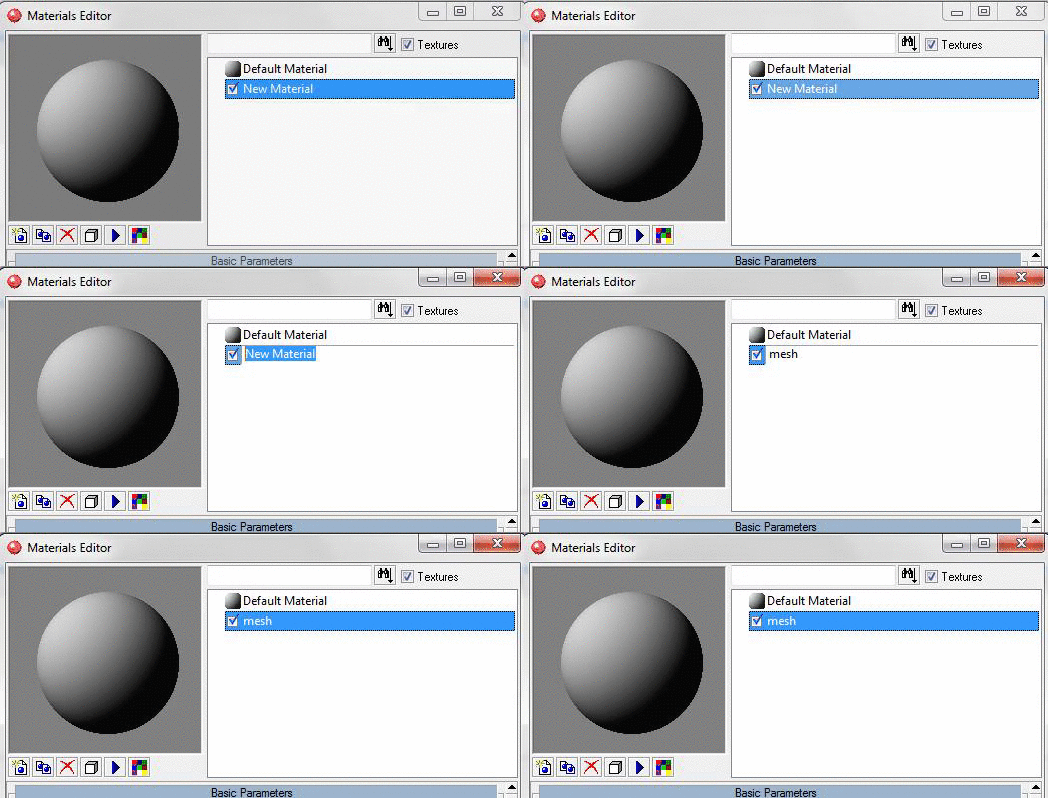
Clikc in this button and "New Material" should appear below "Default Material", click in "New Material" and rename to "mesh":
 >>>
>>>
Now use the window scroll to find the Texture Layers option then click in the button that have no text to open the Texture Browser:
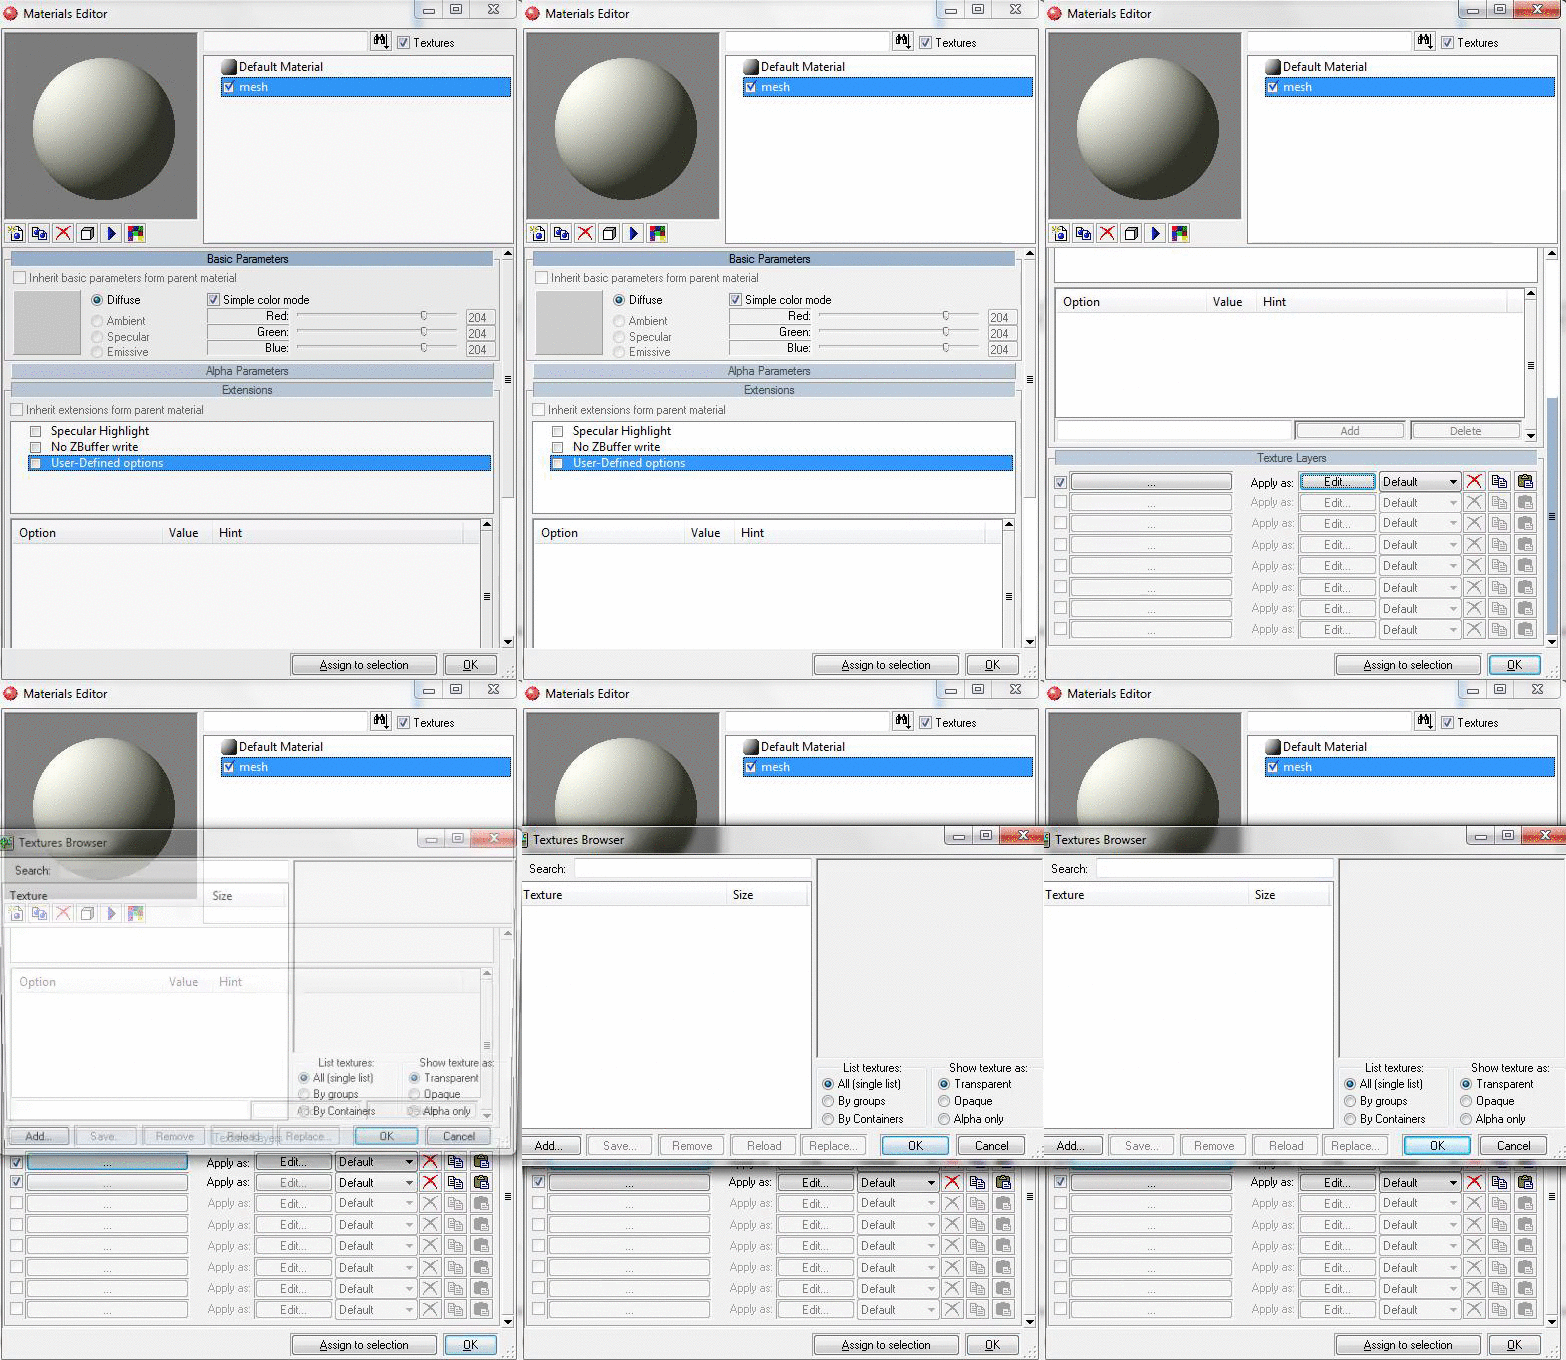
Now click in Add and select some image to be used as texture, add more than one so we can apply different textures to the model. After adding how much textures you want select one of them to be the texture of the new material created. Now create a new material again and name it to "second mesh", scroll down to Texture Layers and click in that button with no text again to set a different texture to this material. In the end you will have two materials each one with a different texture. Now let's apply the texture to parts of the model, to make easy to select an object click in Auto (that is close to SELECTED MODE) then click and drag the mouse to draw a square over the object that you want select:
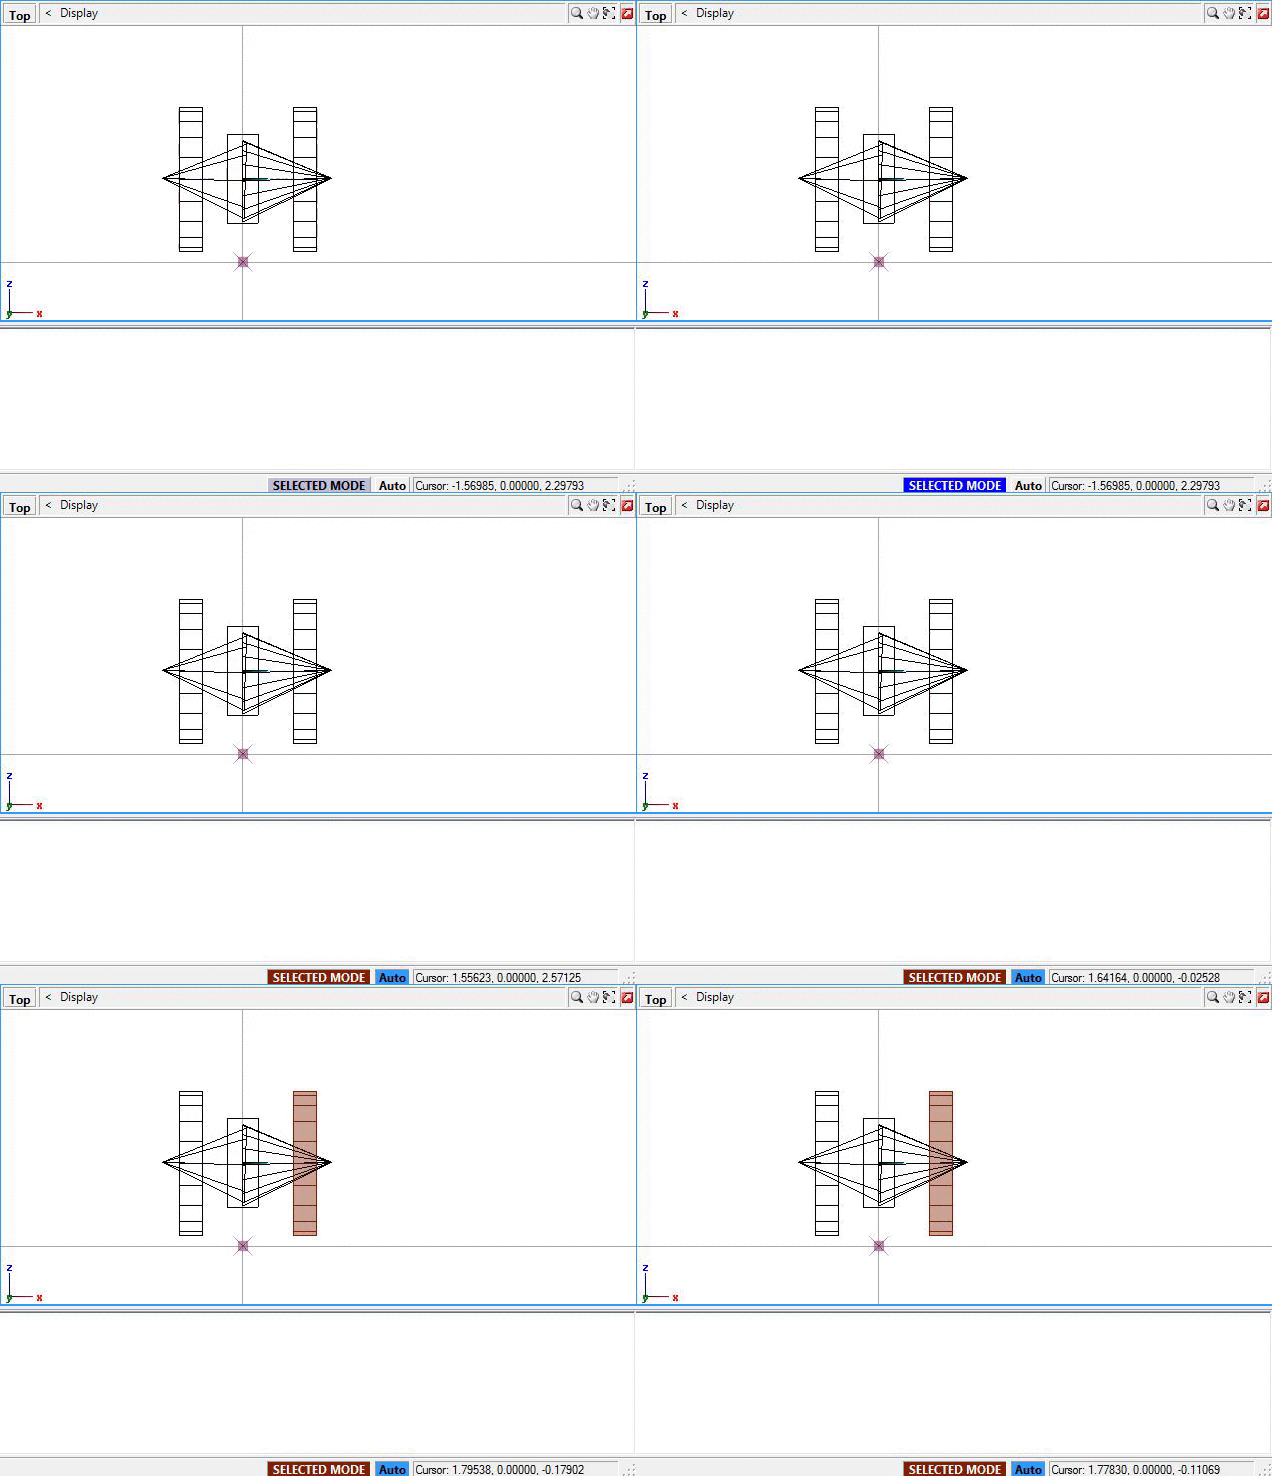
Now click in View > Materials Editor, click in one of the materials that you created then click in "Assign to selection":
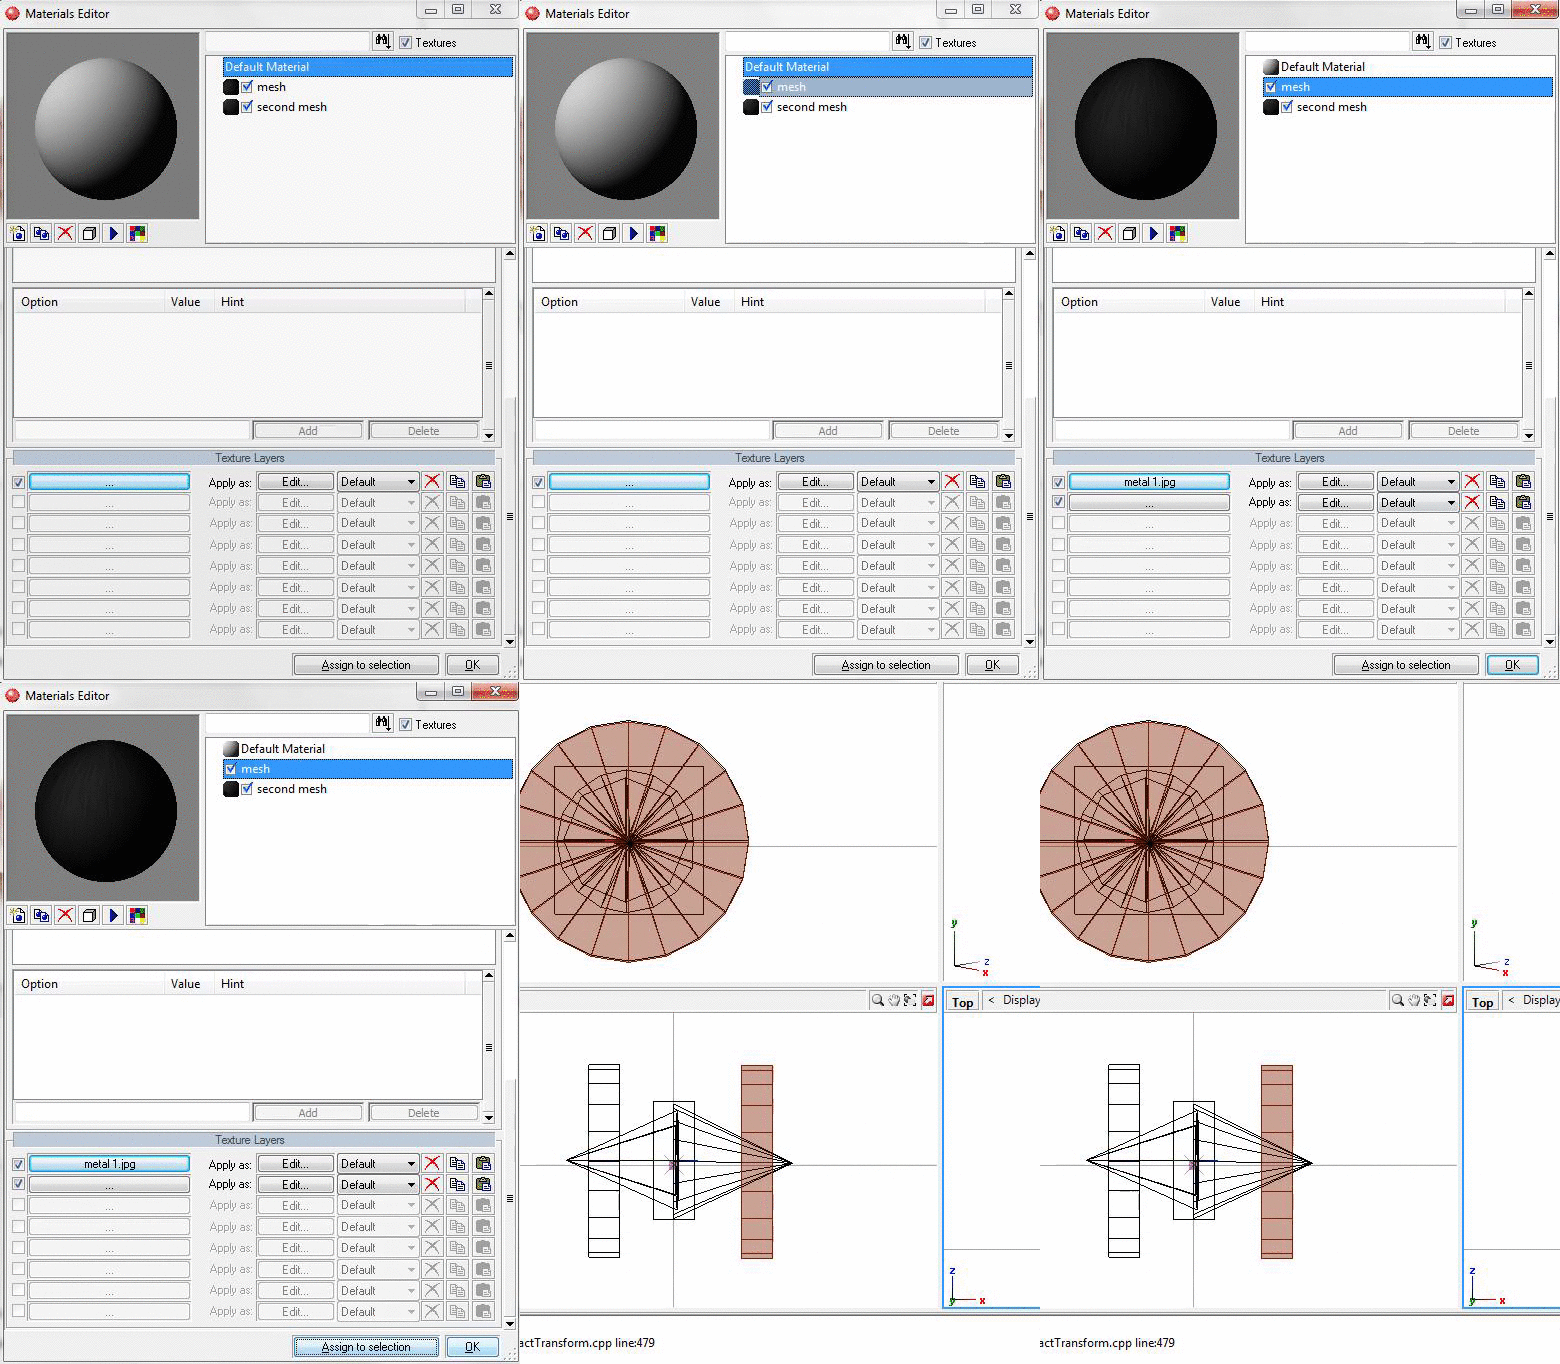
The selected object should have the texture applied on him, perform the same select and apply texture thing in other objects.
IMPORTANT: This is the most basic way to apply textures (i guess) and its not the more accurate and indicated one, but for this basic tutorial is enough
Now before export the model we must take care of the names of the objects created (Box, Cone, Cylinder, etc.), each object must have a different name or the export will fail, the name of the objects are located by default on left botton corner, double click a name to edit it, set a different name for each object.
Now we need to attach the objects to create one custom object in the end, use the Attach feature and click in one of the objects then click in another attaching them, perform the same action until you attached all objects in one, note that the names will of objects will disappear when you attach then, only one name will left:
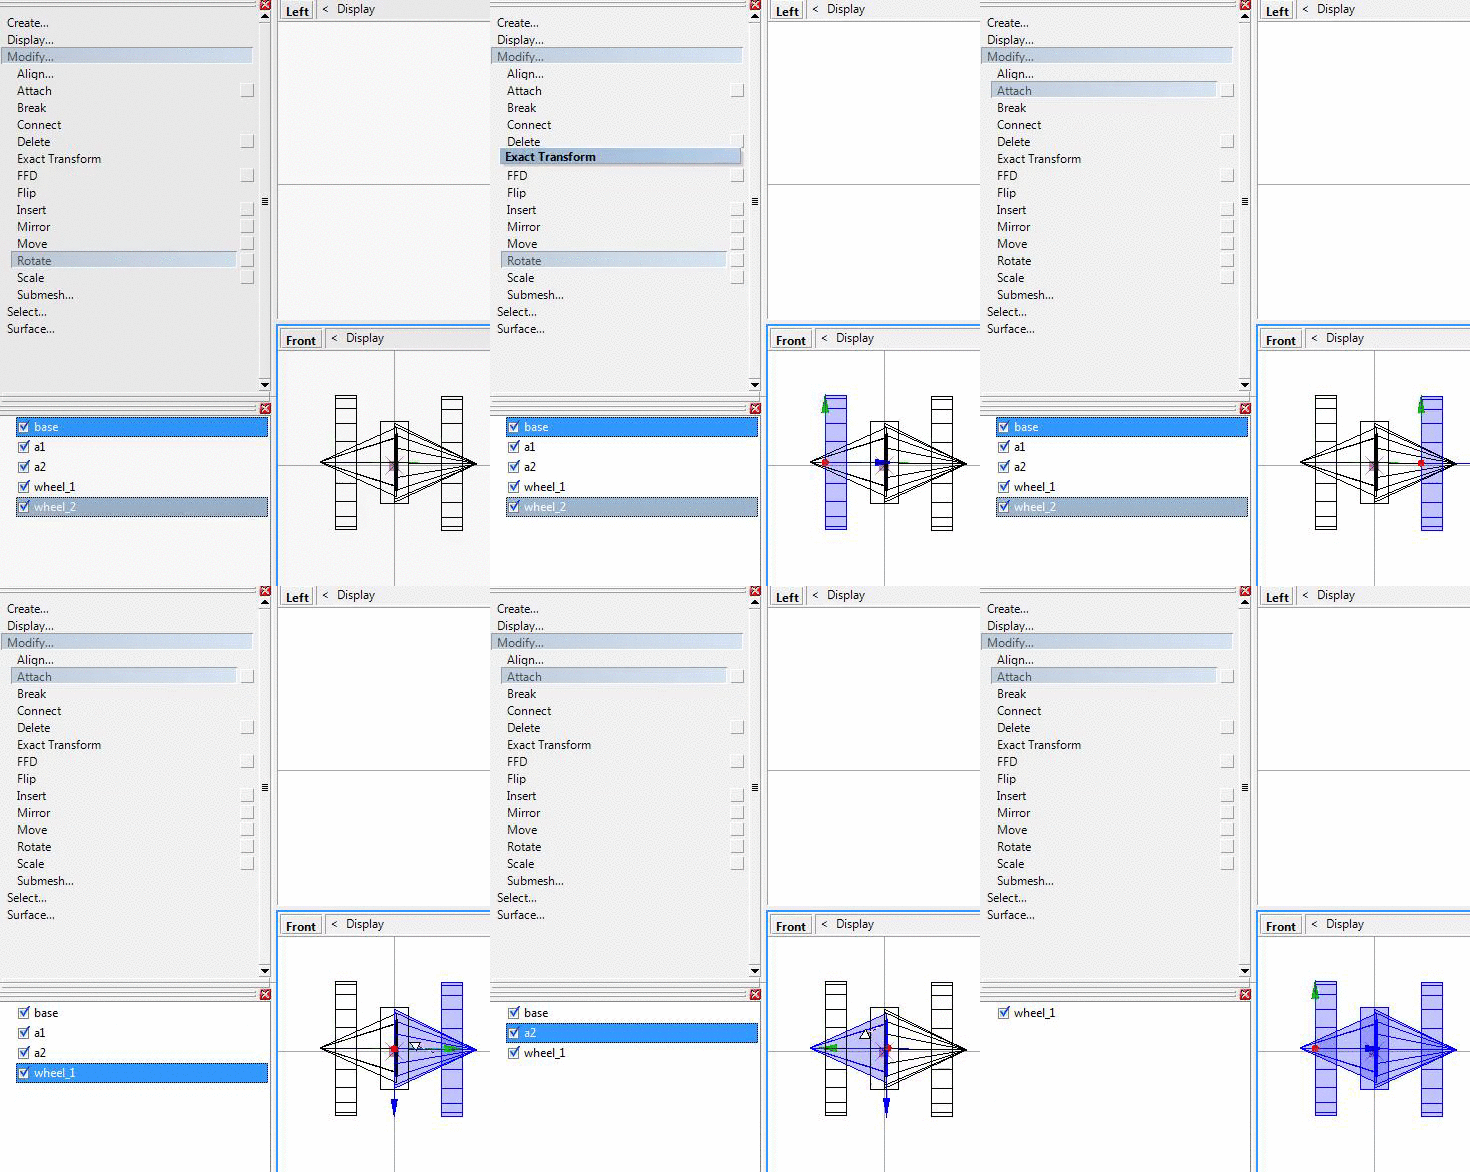
When you are done save the model going to File > Export and in the next window select GTA IV (*.wft...
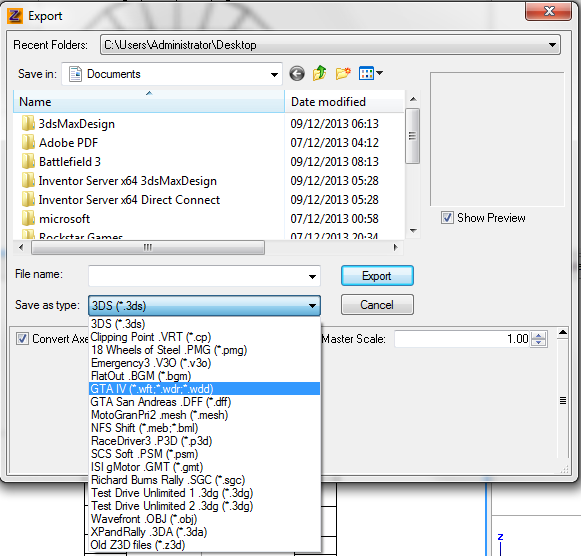
Set for example the name test_model.wft, mark the option Stored Textures and click in Export:
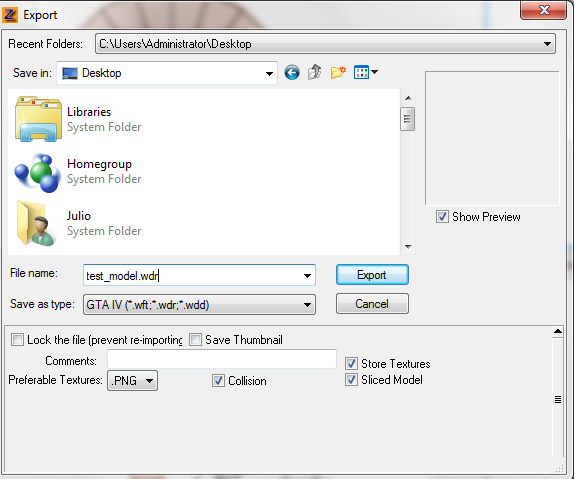
*I tested with extension .wft and the result is more accurate , so, use .wft instead of .wdr
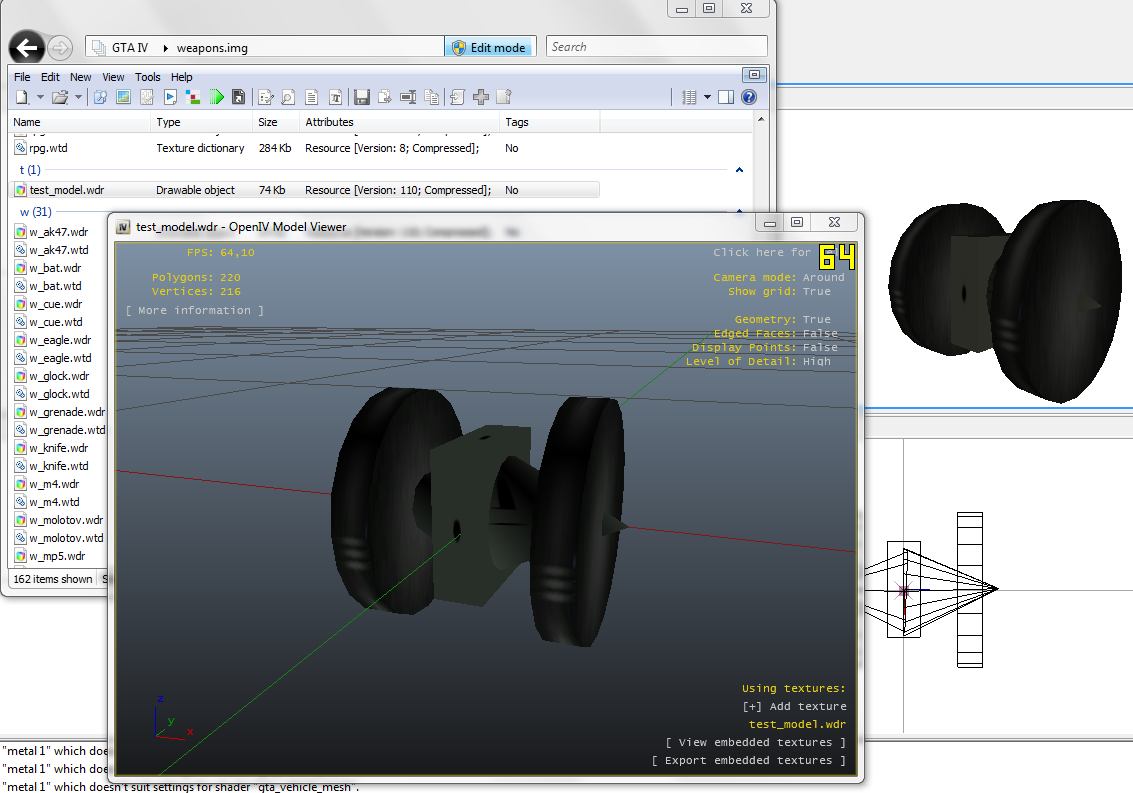
Now usign OpenIV add this model to weapons.img, for example, double click it and see if looks like what you have in ZModeler:
Now to see if really works in game using scripthook press ' or ~ to show the console window and type the command: spawn test_model, the model should appear in front of player:
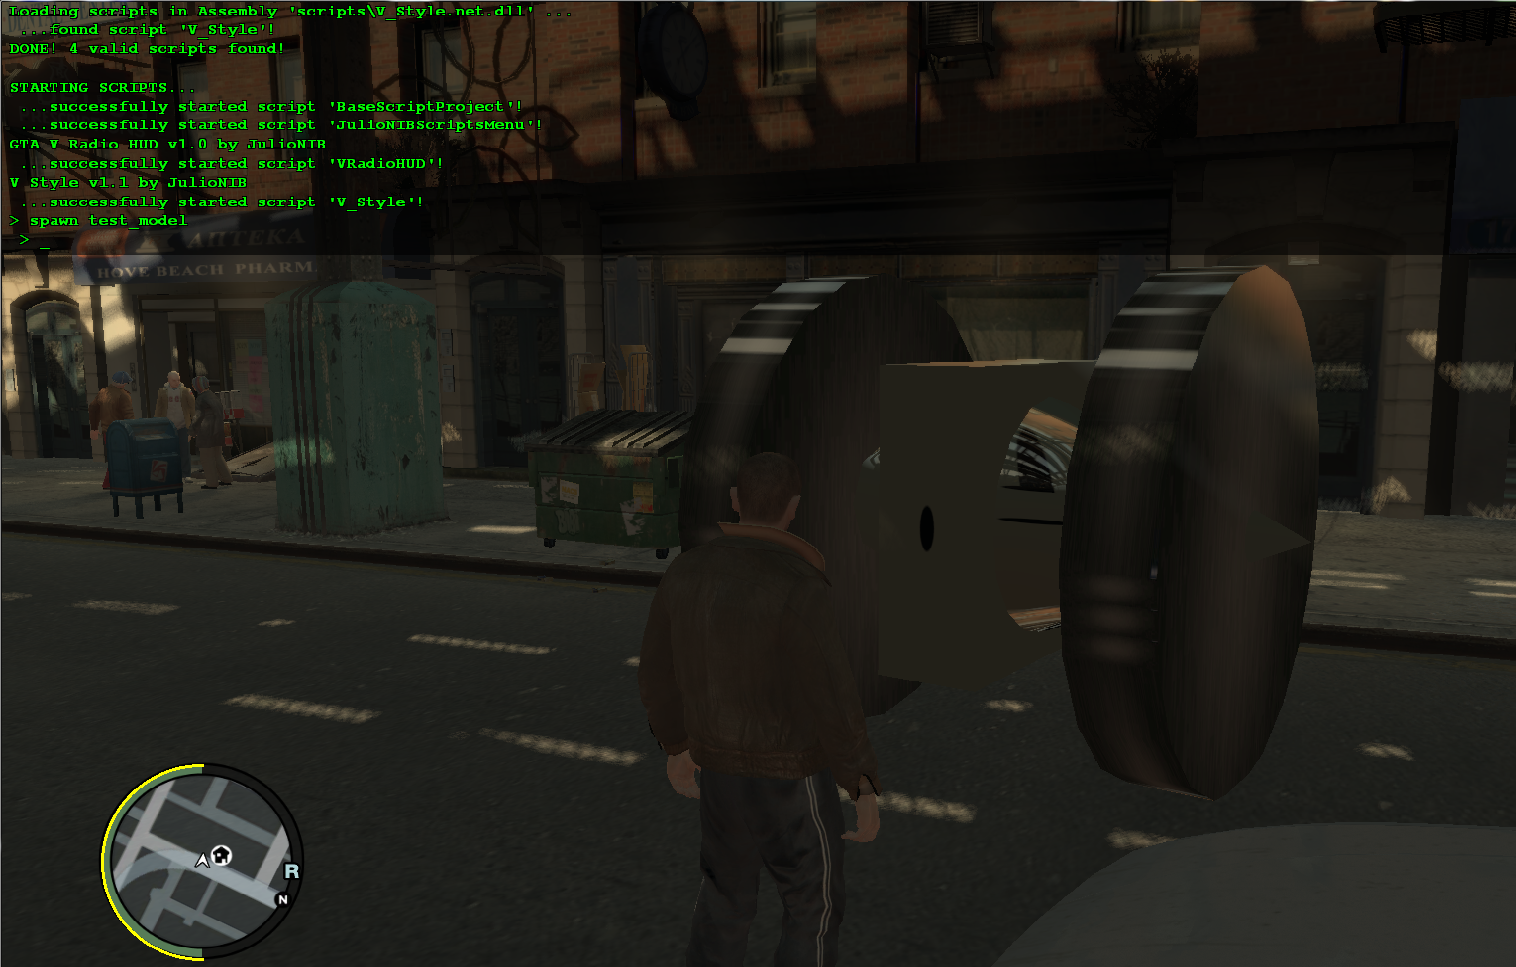
Done, we have a weird model in GTA IV ^^
But it has no collision, we will talk about collision later.
Remember: This tutorial is very basic, just to show a basic way to create a custom shape and insert in GTA IV
Download the project that i created while making this tutorial here.

Ok, first of all the requirements:
ZModeler (recommended 2.2.6 build 992)
OpenIV
GTA IV/EfLC

Open Zmodeler, you probably will have this screen:

Make sure that your screen looks close to the one in last picture, the SELECT MODE and the "Auto" buttons may affect if they are down.
Now let's draw a simple cube, click in the following button and select Box, then click again over the Box icon to select the feature:
 >>>
>>> 
Now in one of the screens draw a simple square:
Do a simple click where you want to start the square, move mouse where you want to be the oposite corner then click again, now move mouse to determine how "long" this object will be, click again and a window should appear, just click OK:

If everything is fine you should see a shape on screen, if you go to the 3D window you can use mouse click and move + scroll to change zoom and rotation around the 3D object:

Let's make another shape just for example, this time a cone, in that button where you selected Box select Cone:
 In one of the draw windows click where you want to be the center of the cone like if you are seeing him from above, then move mouse to determine the diameter and click again, now move the mouse determining the height of the Cone:
After doing the last click you will see that window with Ok button again (Primitive options), in this window you can increase or decrease the "level of detail" of this cone changing the value of Side segments, the default value is 8 sides that will result in something like this:
 >>>
>>>
If you increase to 16 for example you will have something like this:
 >>>
>>>
Ok, now another basic feature that we need to know how to use is Move, let's move those objects to create something less ridiculous ^^
In the left side you will see some options (Create, Display, Modify, etc.), click in Modify and then click in Move, now in one of the 2D windows, move mouse over one of the objects and you will see that it changes his color, if you click and hold you can move the object in that 2D window, if you need to move in different directions you need to perform this action in one of the other 2D windows.

IMPORTANT: The type of selection determined by those buttons here:
 will determine what you will move, the default selection (Object) will move entire object, the other options will move faces or single parts of the object, i don't will talk about them now but you can kid with them and see what happens.
Other usefull feature is the Rotate, you can access it in same menu where you find Move, before use it make sure that the option Rotate Geometry is marked clicking in the little square that is in front of Rotate text:

Now in one of the 2D windows put mouse over one of the objects and click and move the mous around, the object should spin:

If you need to perform a exact rotation you can use the feature Exact transform.
Now let's add a very basic texture just to let you know where to set the texture, first of all let's add two different "textures", click in View > Materials editor, a window like this should appear:

Clikc in this button and "New Material" should appear below "Default Material", click in "New Material" and rename to "mesh":
 >>>
>>>
Now use the window scroll to find the Texture Layers option then click in the button that have no text to open the Texture Browser:

Now click in Add and select some image to be used as texture, add more than one so we can apply different textures to the model. After adding how much textures you want select one of them to be the texture of the new material created. Now create a new material again and name it to "second mesh", scroll down to Texture Layers and click in that button with no text again to set a different texture to this material. In the end you will have two materials each one with a different texture. Now let's apply the texture to parts of the model, to make easy to select an object click in Auto (that is close to SELECTED MODE) then click and drag the mouse to draw a square over the object that you want select:

Now click in View > Materials Editor, click in one of the materials that you created then click in "Assign to selection":

The selected object should have the texture applied on him, perform the same select and apply texture thing in other objects.
IMPORTANT: This is the most basic way to apply textures (i guess) and its not the more accurate and indicated one, but for this basic tutorial is enough

Now before export the model we must take care of the names of the objects created (Box, Cone, Cylinder, etc.), each object must have a different name or the export will fail, the name of the objects are located by default on left botton corner, double click a name to edit it, set a different name for each object.
Now we need to attach the objects to create one custom object in the end, use the Attach feature and click in one of the objects then click in another attaching them, perform the same action until you attached all objects in one, note that the names will of objects will disappear when you attach then, only one name will left:

When you are done save the model going to File > Export and in the next window select GTA IV (*.wft...

Set for example the name test_model.wft, mark the option Stored Textures and click in Export:

*I tested with extension .wft and the result is more accurate
 , so, use .wft instead of .wdr
Now usign OpenIV add this model to weapons.img, for example, double click it and see if looks like what you have in ZModeler:

Now to see if really works in game using scripthook press ' or ~ to show the console window and type the command: spawn test_model, the model should appear in front of player:

Done, we have a weird model in GTA IV ^^
But it has no collision, we will talk about collision later.
Remember: This tutorial is very basic, just to show a basic way to create a custom shape and insert in GTA IV

Download the project that i created while making this tutorial here.
